
How to Wax Your Skis

How To Wax Skis
Your skis are a very important part of your skiing equipment and if you look after them well they will see you through years of fun on the slopes. Whilst you can pay others to maintain your skis for you, learning how to do it yourself is always handy and it teaches you a bit about your equipment too.
If you are coming to the Chill Factore to ski and don’t have your own gear, it’s not a problem. The rental of high quality skis and boots is included in the price. And if you are looking to get some of your own we have a whole indoor street full of shops to choose from.
How often you should wax your skis depends on so many variables it’s impossible to say: the kind of snow, how much skiing you do, the type of wax you use, the kind of skiing you do. Some hard core waxers will do it every time they take their skis out and others just once every months worth of skiing.
The general rule is that if your skis start to feel sticky and slow as you are skiing or if you can visibly see that the bases are getting dry then give them a wax. If you only go skiing once or twice a year with them, then get them done or do them yourself each time you go away.
If you are buying new skis you absolutely must wax them before you use them: the manufacturer’s wax is there to protect them in storage not to protect them on the slopes.
Equipment For Waxing Your Skis
Before you can start to wax your skis you will need some essential equipment, like wax for example.
- Heavy rubber band/ rubber brake restraint
- 2 ski vices
- Wax iron
- Wax
- Ski scraper
- Nylon ski brush
- Clean soft cloth
How to Wax Your Skis
- First you need to get those ski brakes out of the way. Press down on the binding to raise the brake arms and then hook the heavy rubber band over one arm, up over the binding and attach to the brake arm on the other side.
- Fasten your ski in the ski vices securely with the base of the ski pointing upwards.
- Before you can begin with the new wax you need to get rid of the old wax. Scrape the old wax off with the ski scraper starting at the tip and scraping all the way down to the tail in long strokes.
- Brush the ski with the nylon brush from tip to tail in one long stroke to be sure to be rid of any remnants of old wax.
- Wipe over the ski, again from tip to tail in one long stroke, with the soft clean cloth.
- Rub the wax over the whole bases of the ski – this will protect it against the heat from the iron. Rub it from tip to tail and tail to tip in single strokes that go the length of the ski to make it nice and even.
- Makes sure you have the right wax for the job.
- Heat your iron to between 110-130 degrees centigrade, but always check your packaging to see what’s recommended.
- Hold your wax against the iron – careful now, it’s hot – and melt the wax onto the underside of the ski in a zig zag pattern all the way from tip to tail. If the wax starts to smoke against the iron, the iron is too hot and needs turning down a little.
- Iron the wax trail into the ski working from the centre out to the tip and then the centre out to the tail. Then go over the whole ski from tip to tail once more to make sure it is all melted in and even. Be sure to move the iron along the length of the ski not back and forth to prevent scratches.
- Let the ski cool for at least 20 minutes.
- Scrape off the wax. I know you’ve just put it on, but the ski only needs the wax that has been absorbed into the surface not the stuff that is sitting on top. Be sure to remove the wax from the edges as well.
- Brush over the ski with the nylon brush until it shines.
- Repeat with the other ski.
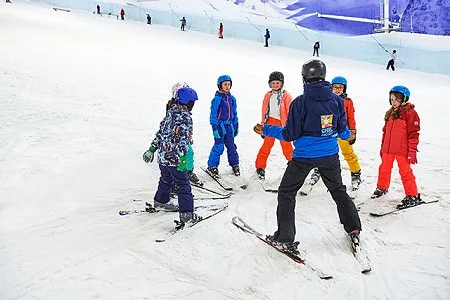
Now that your skis are ready to go why not bring them down to Chill Factore and give them a whirl? We are open 7 days a week and have lessons for all standards for skiers from absolute beginners through to intermediate and advanced.